* Design and document the system integration for your final project.
☑ Implemented methods of packaging?
☑ Designed your final project to look like a finished product?
☑ Documented system integration of your final project?
☑ Linked to your system integration documentation from your final project page?
Design and document the system integration for your final project
This was a crucial week for all Fab Academy students! Why? Because the assignment for this week is essential for registering a slot for the final project presentation — something that determines whether we graduate this term, as emphasized by our instructor, Mr. Steven Chew.
Project Planning
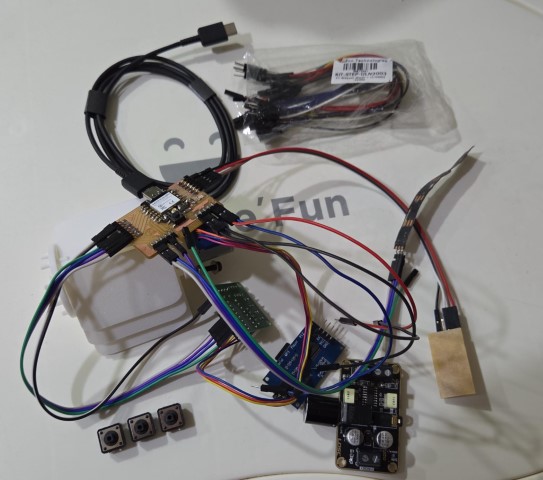
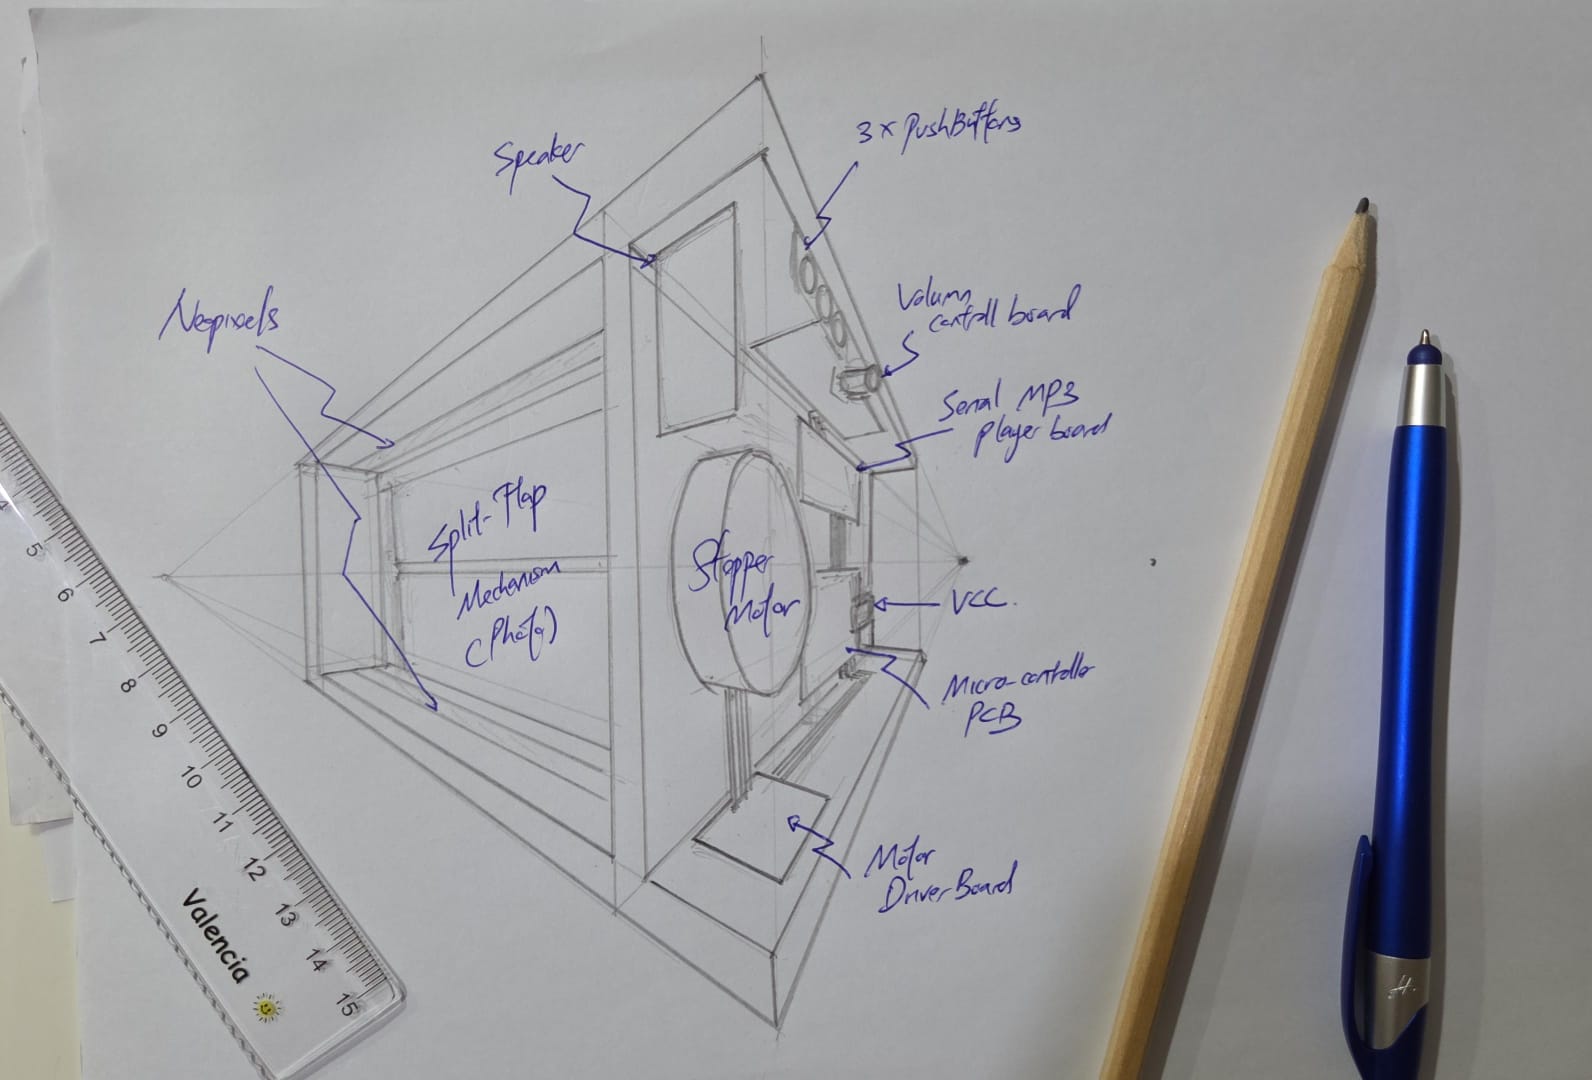
To avoid a chaotic wiring setup — often referred to as a “wire nightmare” — I began by organizing the layout and integration of all the components for my musical box project. After discussing with my Fab Academy partner, Florimond Chu, we finalized a concept and I sketched a layout of the final design.
Bill of Material (BOM)
I compiled a BOM listing all the major components needed for the musical box:
| COMPONENT |
MODEL NUMBER |
QTY |
COST |
PURCHASE FROM |
REMARK |
| Stepper Motor |
28BYJ-48 |
1 set |
$6.40 (price from Kuriosity) |
Lab Inventory |
With Motor Driver Board |
| NeoPixel Strip |
144LEDs/M 1M - IP30 White PCB |
100 mm Length (top + bottom) |
$7.63 |
Lazada - WNPQKC Shop |
N/A |
| Serial MP3 Player |
YX5300 UART Control Serial MP3 Music Player Module |
1 pc |
SG$6.71 |
Shopee - zwinz1aa.sg |
N/A |
| PushButton |
Momentary Pushbutton Switch - 12mm Square |
3 pcs |
$2.25 |
Lab Inventory |
N/A |
| SEEED XIAO RP2040 micro-controller board |
1597-102010428-ND (Digikey) |
1 pc |
SG$10.00 |
Lab Inventory |
N/A |
| 1.75mm PLA+ 3D Filament |
Bambu Original Filament |
Depends |
$51.00 |
Lab Inventory |
Various colour |
| 3mm Acrylic/Plywood Board |
N/A |
Depends |
N/A |
Lab Inventory |
N/A |
| Printed Sticker |
AVS Technologies Pte. Ltd. |
Depends |
N/A |
Lab Inventory |
Matte surface finishing |
| 1W 8ohm Speakers |
N/A |
1 pair |
N/A |
Lab Inventory |
DIY Speaker Kit |
| Bolts, Screws and Fasterners |
N/A |
Consumables |
N/A |
Lab Inventory |
N/A |
| FR1 Copper Board |
N/A |
1 piece |
$1.00 |
Lab Inventory |
N/A |
| 5V AM8406 Digital Amplifier Board DIY Small Speaker 5W+5W Dual Channel Stereo Amplification Module |
N/A |
N/A |
SG$7.68 |
Shopee - walitown.sg |
N/A |
| Wires, Resistors, Pin heads, Soldering consumables |
N/A |
Consumables |
N/A |
Lab Inventory |
N/A |
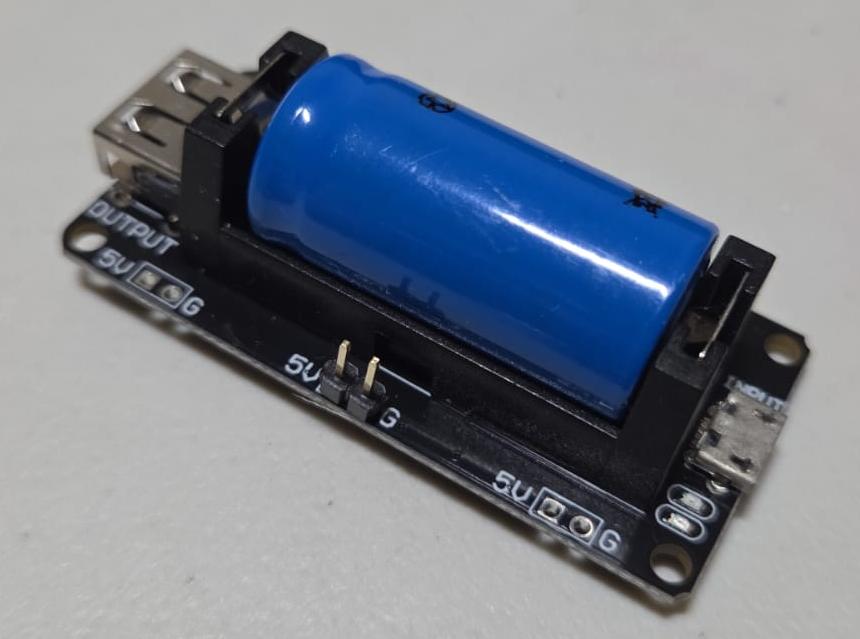
| 5V Lithium Battery Power Board |
N/A |
1 piece |
N/A |
Lab Inventory |
Comes with 1 unit 5V lithium cell |
| 3.5mm Auxiliary Audio Jack to Jack Cable 90 Deg Right Angle |
UGREEN |
1 piece |
$3.96 |
LazMall - UGREEN |
N/A |

Updated Block Diagram
I revised my block diagram for the project (something I should have done earlier) to better plan and initiate production.
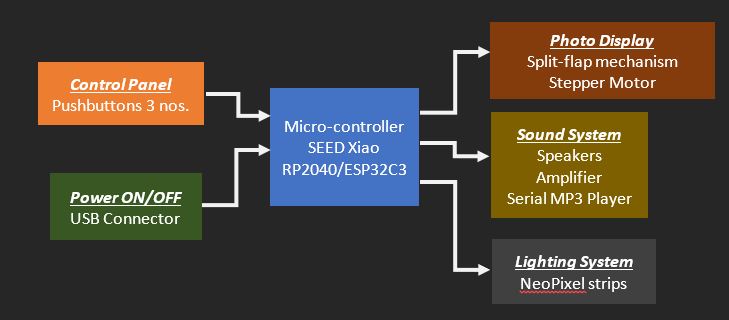
Component Breakdown:
1) Pushbuttons (x3)
• These act as the main input interface.
• Due to complications with capacitive touch sensing, I opted for traditional pushbuttons.
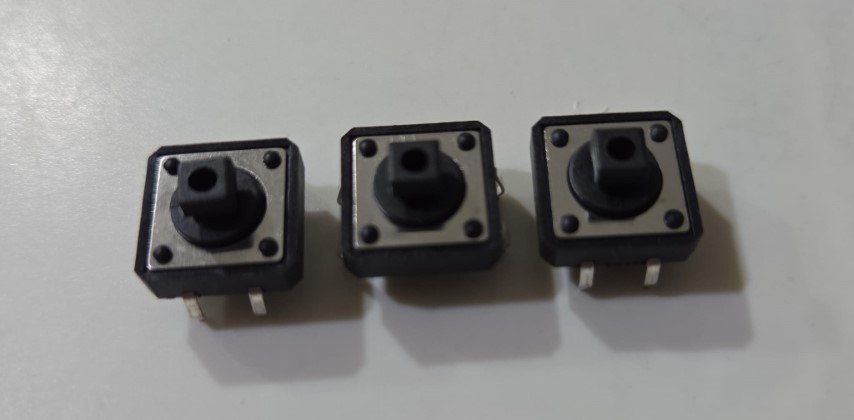
• I plan to use molding and casting techniques to make custom button caps.
2) Power Supply (USB)
• The entire system will be powered via a USB-A to USB-C cable (5V).
• Suggest to opt in a Battery Power Bank to be able to run without direct power.
3) Microcontroller
• Since Wi-Fi/Bluetooth is not required, I’ll fabricate a new PCB using the SEEED Xiao RP2040 board. I will salvage the MCU from my previous development board.
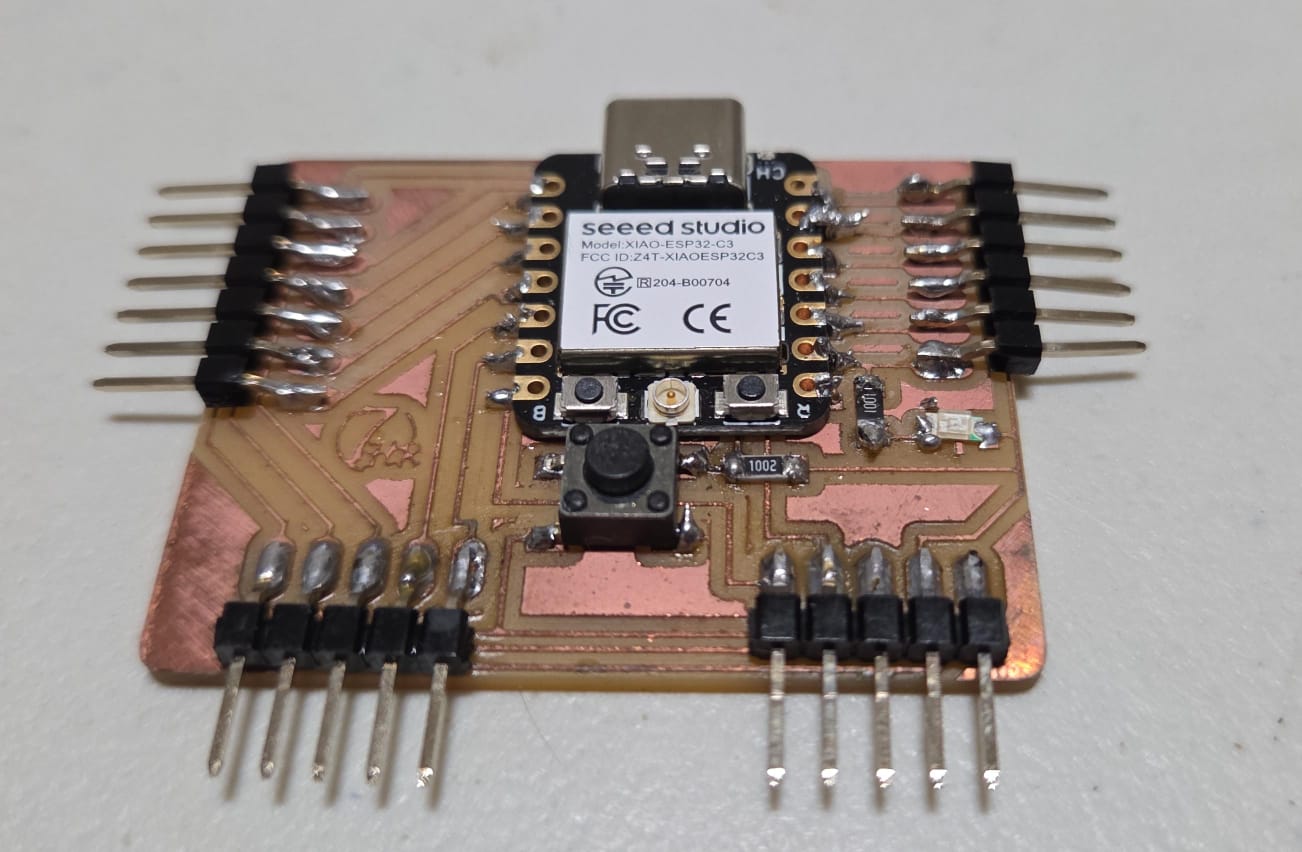
• Need to re-design the development board to suit the component layout across the system layout.
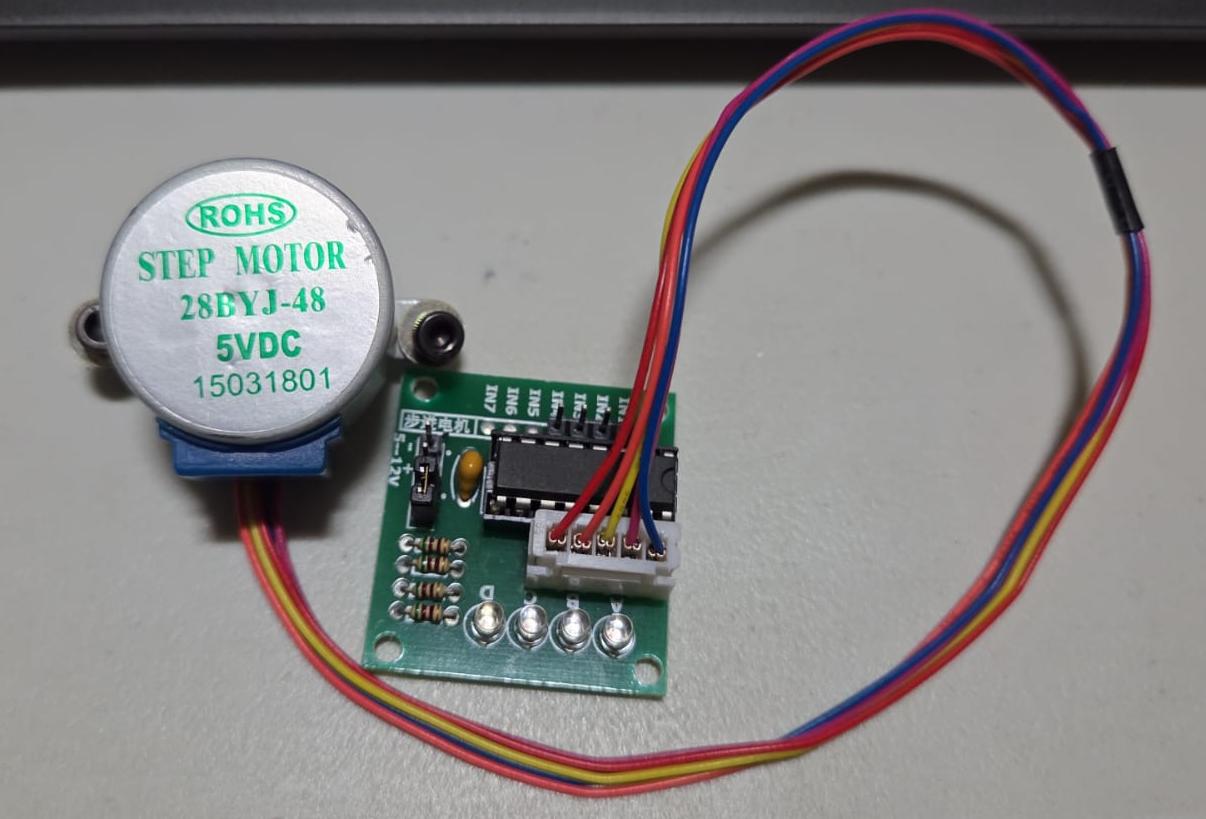
4) Stepper Motor
• The 24BYJ-48 stepper motor proved effective for rotating the split-flap drum.
• Programming is straightforward as I’ve worked with this model before.
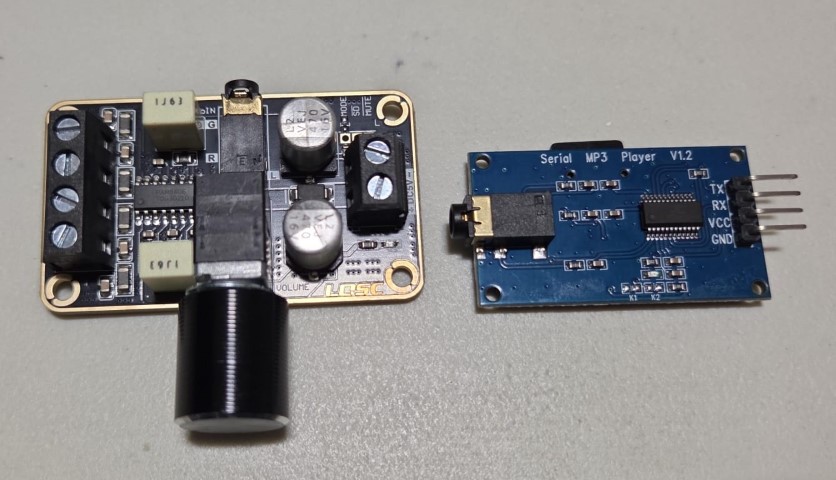
5) Serial MP3 Player
• I acquired this board earlier but haven’t tested it yet.
• I anticipate a challenging integration process.
6) NeoPixel RGB LEDs
• NeoPixels will be installed at the base and above the split-flap unit, each controlled independently.
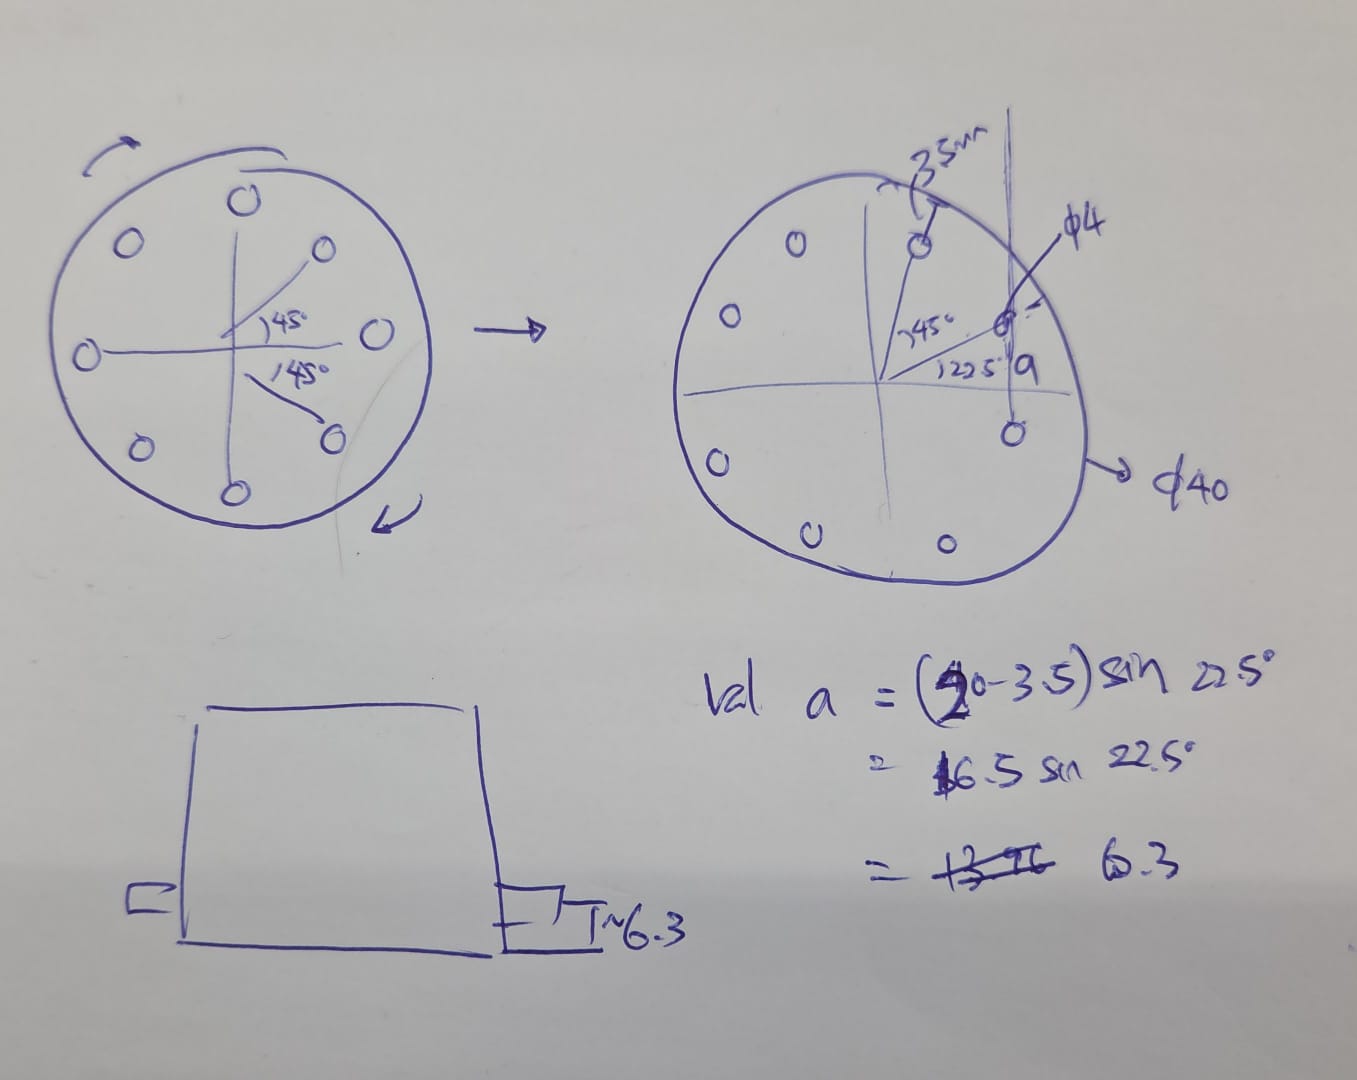
Split-Flap Mechanism
Inspired by a model on MakerWorld: Simple Split Flap Display by Chipmunk54I made key adjustments:
• Reduced to 8 flaps (from 10).
• Doubled flap length to 60 mm.
• Added support and bearing at the drum’s end.
Some calculations work has been performed before finalizing the final model:
Sample 3D prints in different flap heights. Test run justified based on the gaps between the flaps and the flexibility of the flaps with the designed drum.
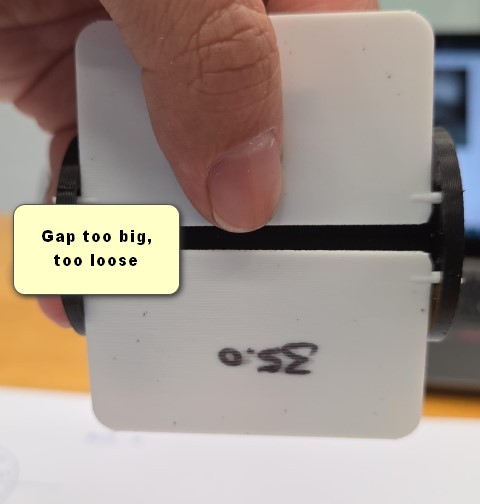

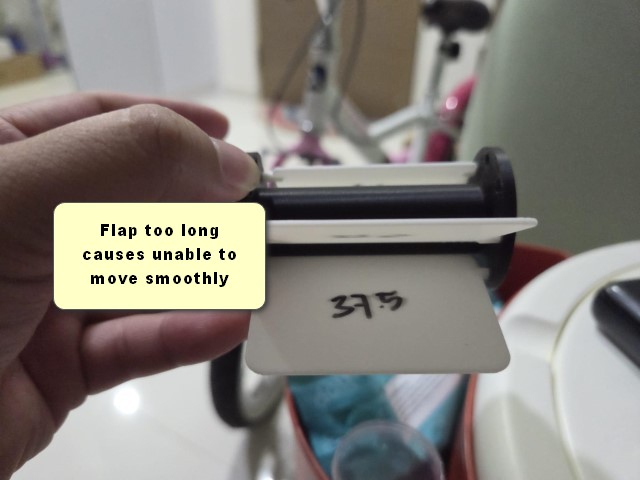
Based on the above testing, the 36.5mm-Length Split-Flap piece was selected for my model.
The final design models to be printed are shown as below:

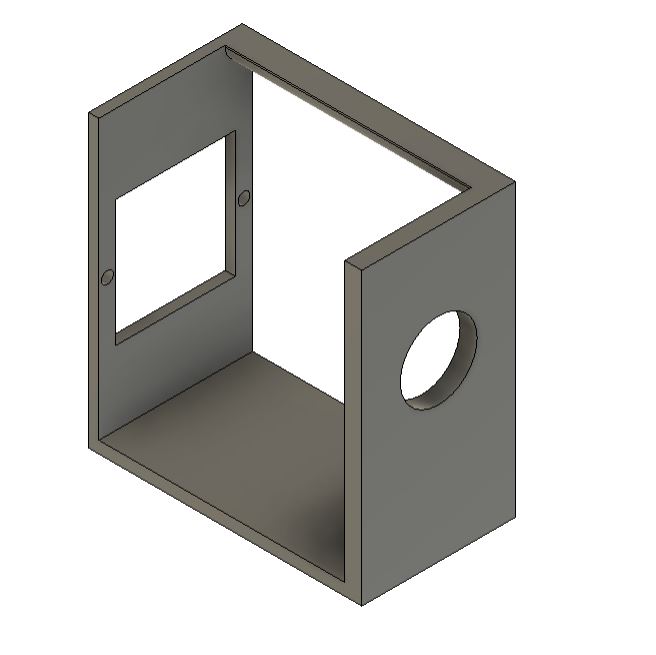

Musical Box Frame
The frame includes a component compartment on the right side. I measured each component and drafted a layout for optimal space usage and cable routing.
| COMPONENT |
DIMENSION (L x W x Hmm) |
REMARK |
| Stepper Motor |
43.0 x 31.0 x 28.5 |
N/A |
| Motor Driver Board |
35.0 x 32.0 x 11.5 |
Install side-by-side with the stepper motor |
| Development Board |
50.0 x 35.0 x 7.0 |
See NOTE_01 below |
| Speakers (1 pair) |
Diameter 57.0 x 14.0 |
Must be front-facing to throw out the sound |
| Serial MP3 Player Board |
50.0 x 24.0 x 8.5 |
Need to cater access hole for MicroSD card to load in and unload |
| Volume Control Board |
55.5 x 50.0 x 17.5 |
Half of the knob must be exposed for tuning purpose |
| PushButton Assembly |
75.0 x 30.0 x 16.0 |
Cast cap membrane |
| NeoPixel (Top) |
20.0 x 12.0 x 2.5 |
White light shines to the photos |
| Neopixel (Bottom) |
75.0 x 12.0 x 2.5 |
Rainbow running light with 3D print diffuser |
| Battery Pack |
61.0 x 28.5 x 23.0 |
N/A |
Note_01: I will continue to use my newly-made SEEED Xiao ESP32C3 PCB to cope with my final project, as I have sufficient pinouts to run 1 no input device and 3 output devices.
Component Layout Visualization
A side-view diagram was created to visualize the placement and wiring of components. This layout is crucial for efficient cable management from the development board to each component.
The initial layout plan had to be discarded due to the excessive length of both the pushbutton assembly and the sound system holder. Even after opting for a smaller pair of speakers, the total length of the combined systems remained unchanged.
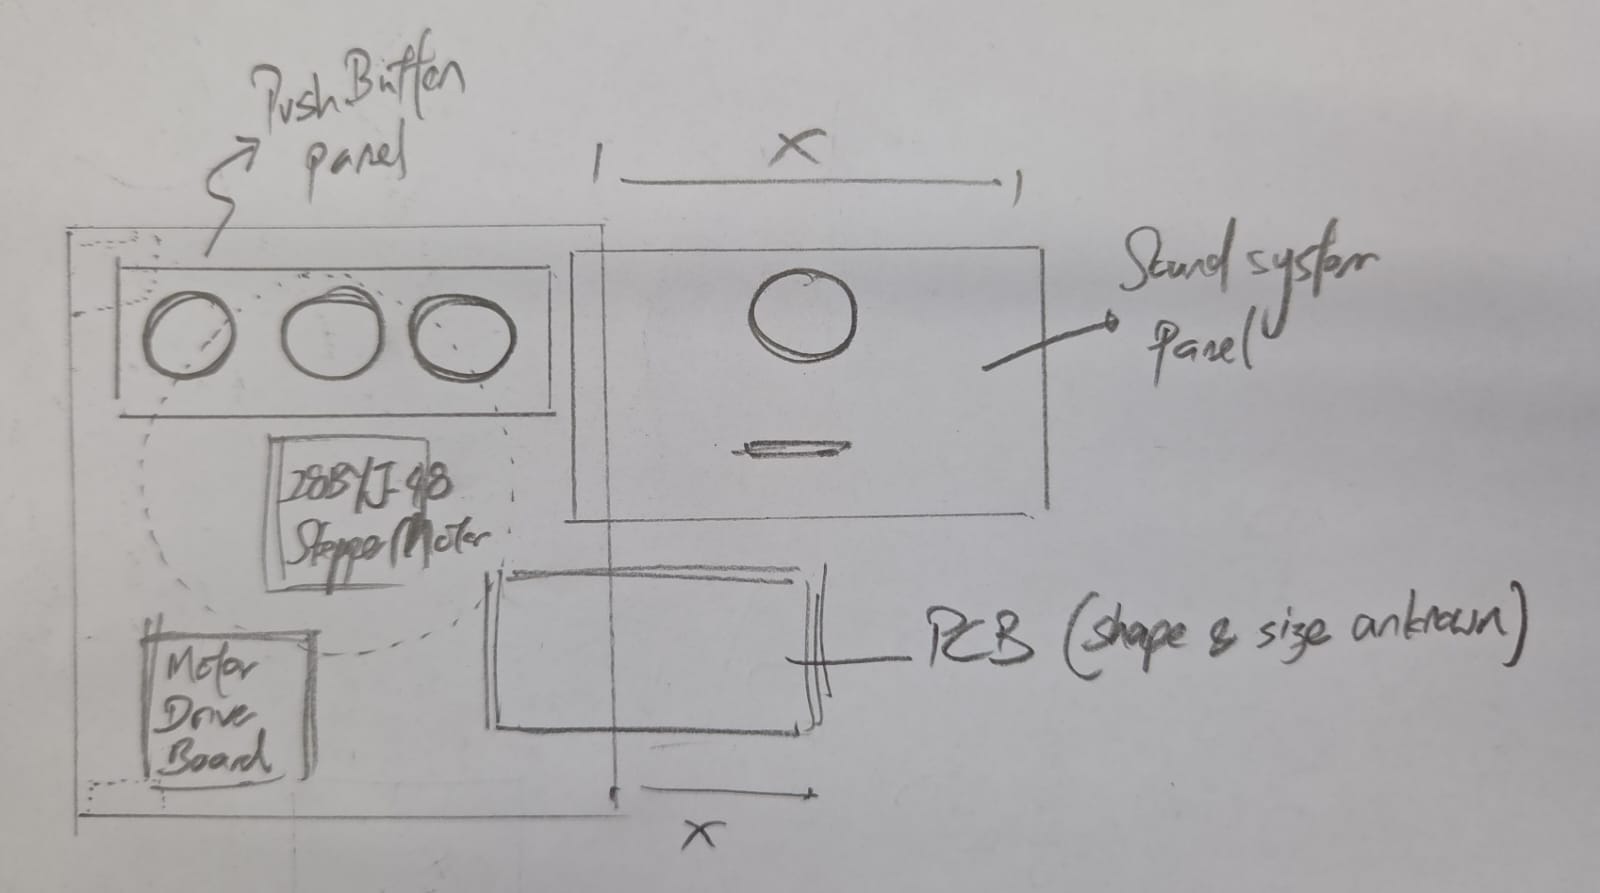
In the second draft of the layout, I repositioned several components to resolve the issue of inefficient space usage.
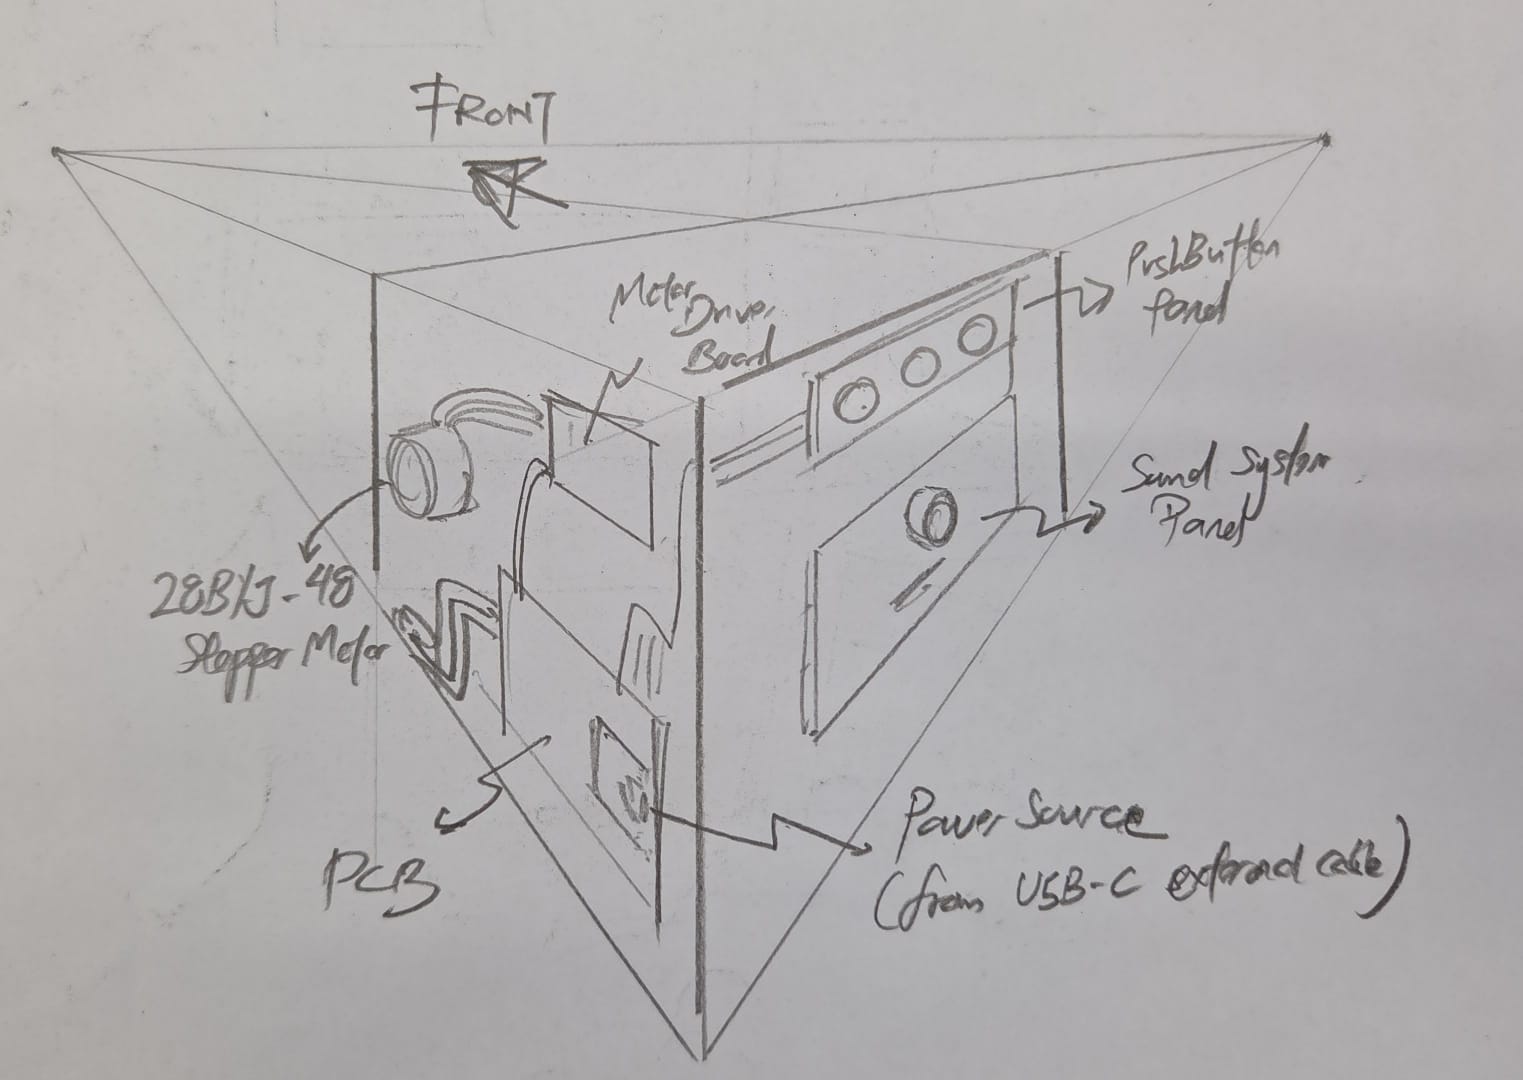
In summary, I relocated the control panel system — comprising the volume control and pushbutton set — to the rear, along with placing the lithium-ion battery cell below and behind the development board. However, this arrangement introduced a drawback: the control panel became difficult to access as it was completely hidden from view.
Component Layout Visualization
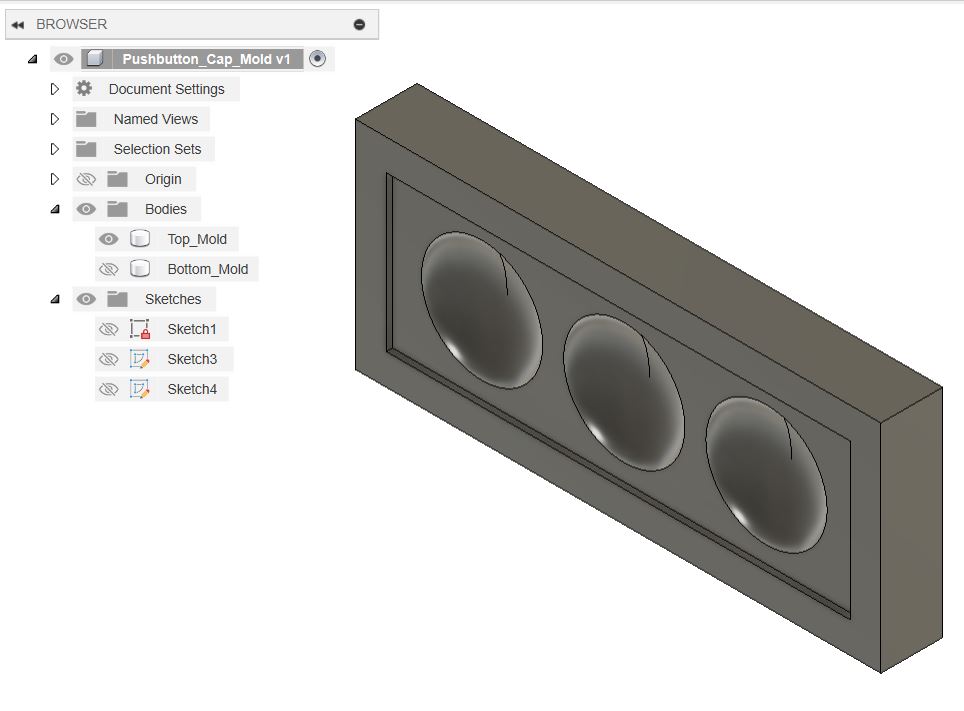
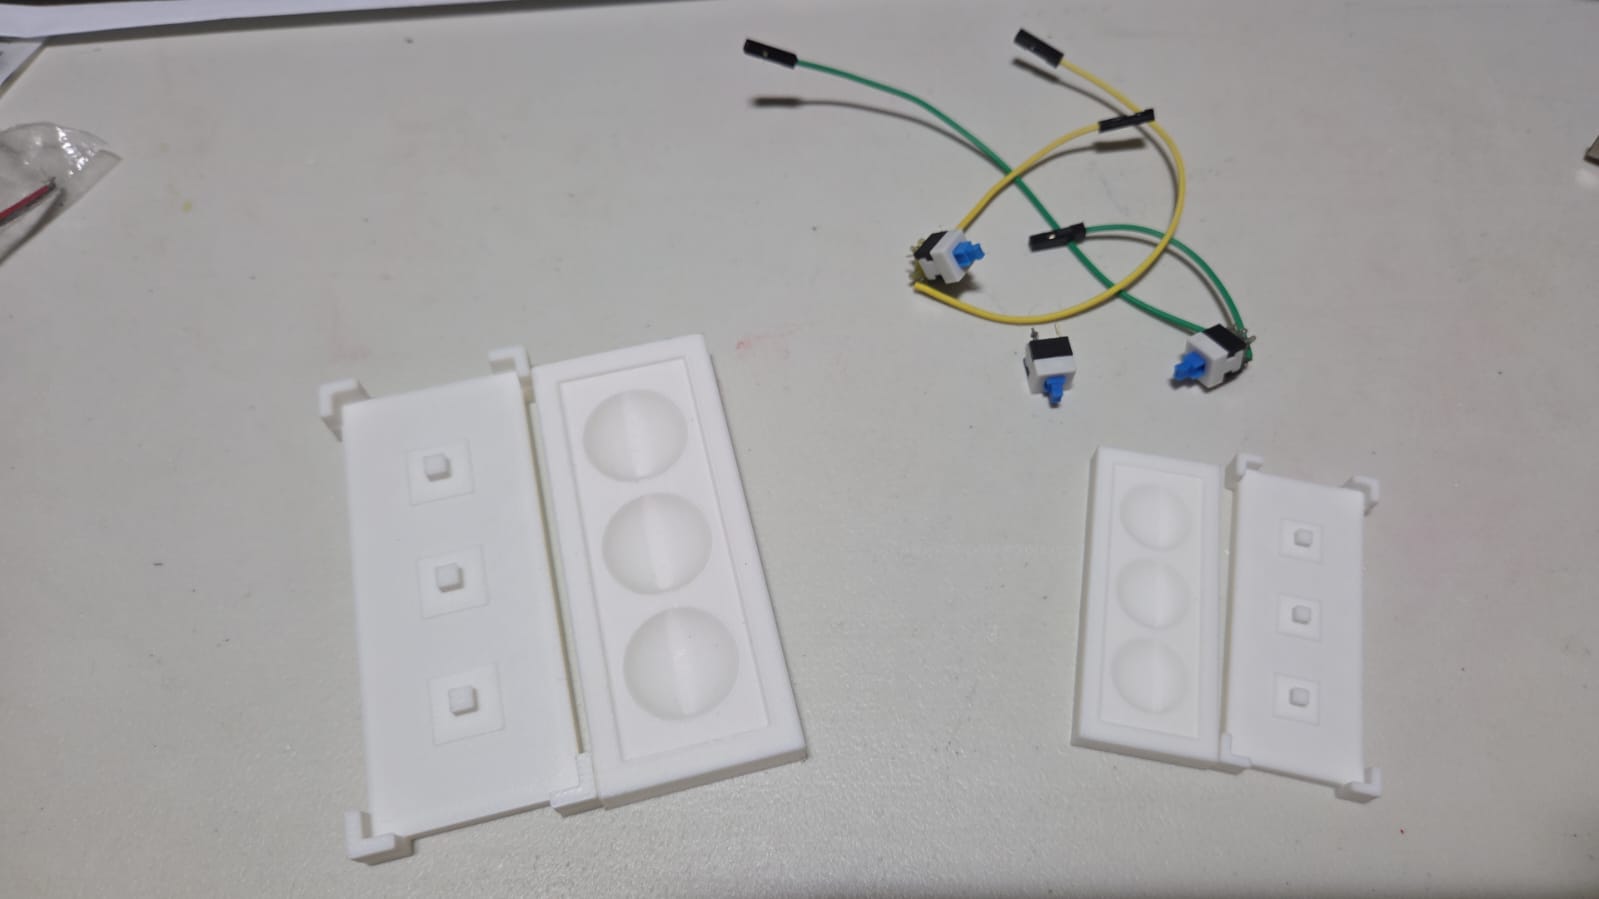
I also designed two sets of 3D-printed hard negative molds to determine the appropriate size for the button cap membrane to ensure it fits properly within the frame dimensions.
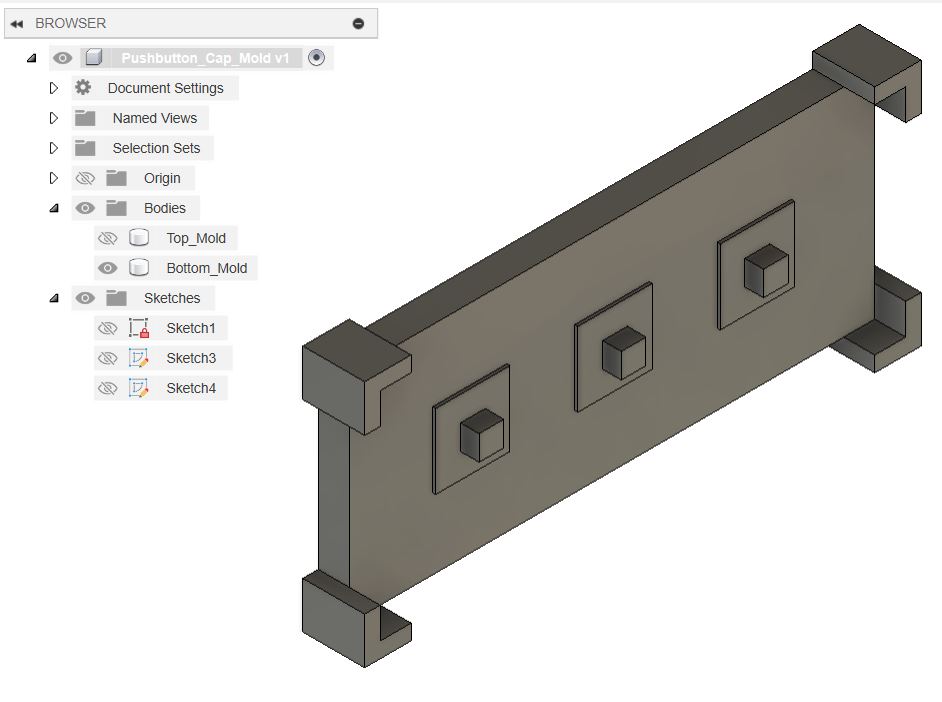
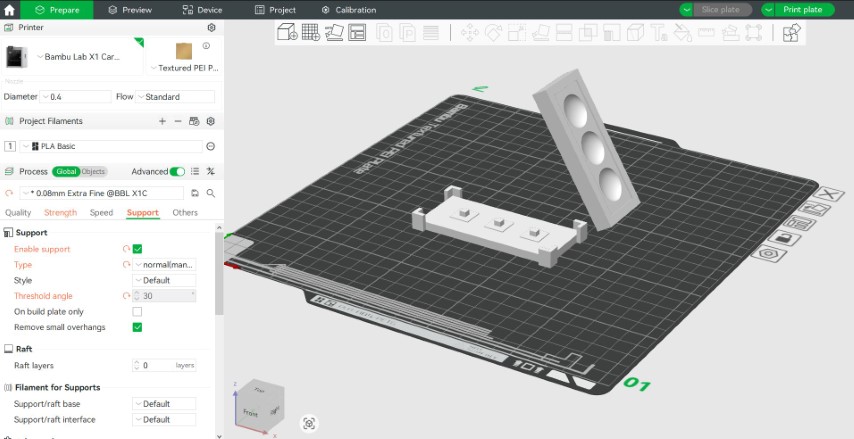
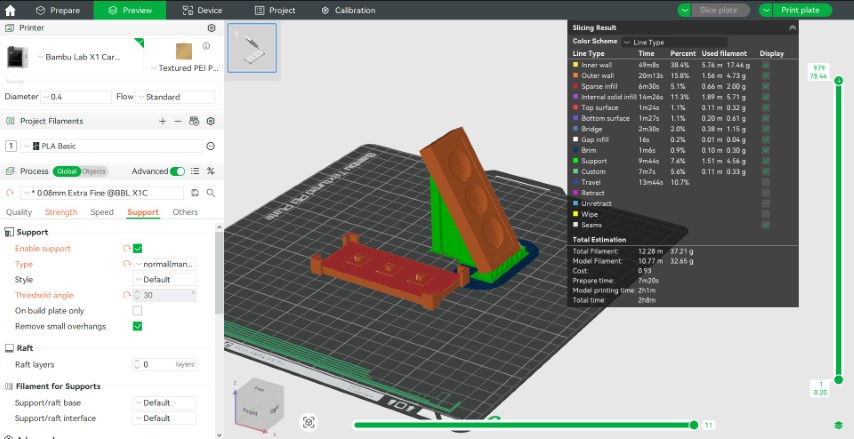
And photo below shows the 2 sizes of mold after finished 3D-printed.
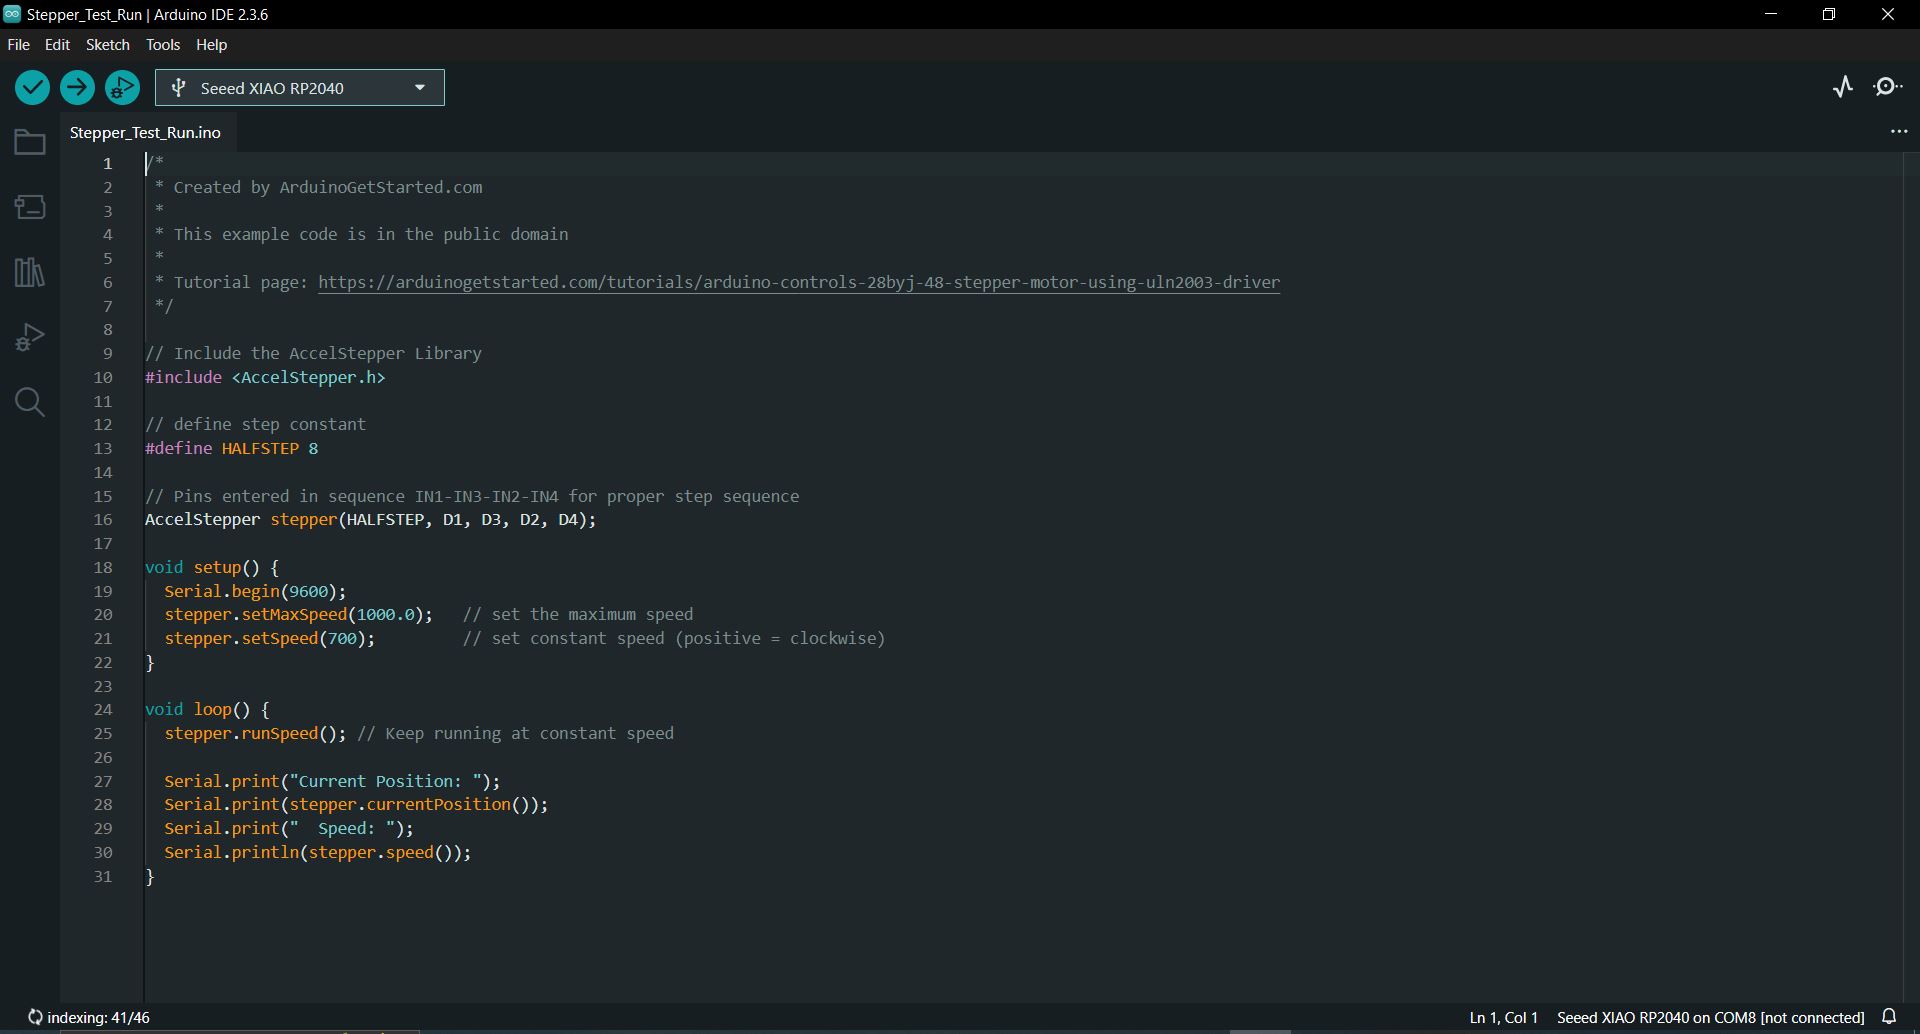
Coding for Split-Flap System using Stepper Motor
To test the split‑flap mechanism, I adapted my Arduino IDE code from the Week 12 coin‑sorting machine assignment to control the 28BYJ‑48 stepper motor. This code allows me to evaluate the motor's motion, speed, and the duration the upper flap holds before releasing.
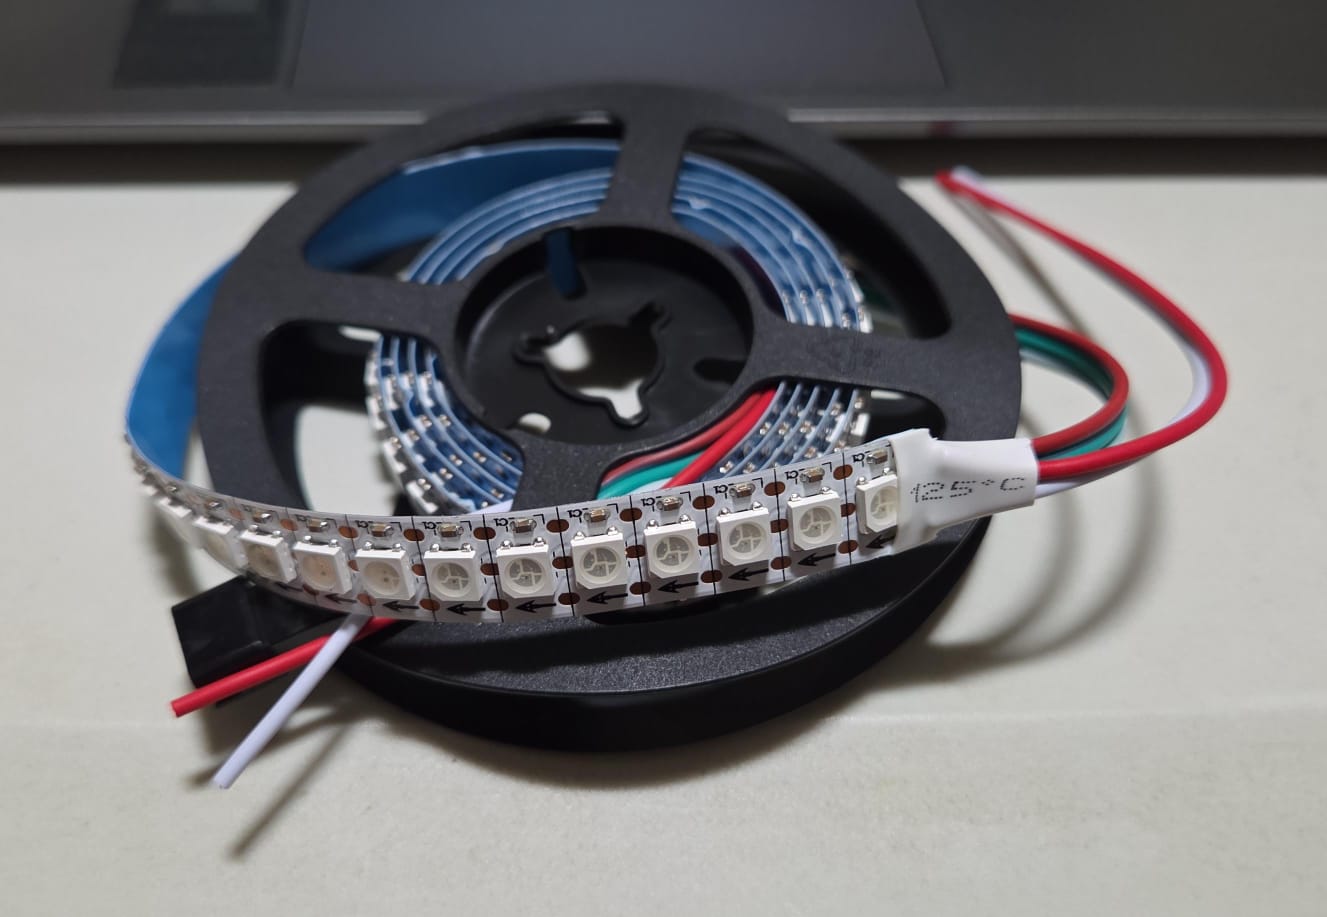
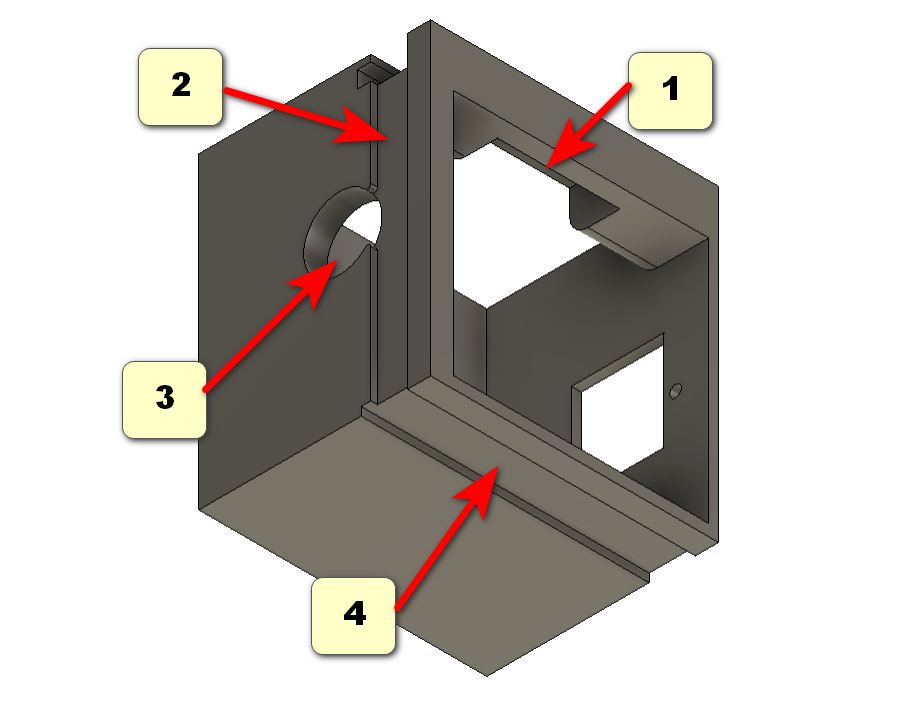
Housing and Integration of NeoPixel Strips
While testing the stepper motor, I also needed to design the housing for the NeoPixel strips that provide the visual effects in the photo screening area. These strips serve dual purposes:
• Top row NeoPixel strip – illuminates the screening area.
• Bottom row NeoPixel strip – provides a rainbow ambient glow for the music box.
For the top housing model, I considered several factors:
• Placement and secure installation of the top row NeoPixel strip.
• Cable routing between the top and bottom NeoPixel strips.
• Correct mounting height for the stepper motor and flap “holding bar” before release.
• Proper positioning of the bottom row NeoPixel strip just beneath the 3D printed diffuser layer.
Further detailed explanation for my system integration can be found at my FINAL PROJECT page.